Bootstrap Checkbox Class
Introduction
Sometimes the simplest aspects might become very necessary-- specifically as you come to need them. As an example just how do your website visitors interact with the web pages you make specifying a basic Boolean action-- just yes or no pertaining to some of the issues you need to ask, how they do accept the conditions or maybe line up a few of the practical selections they might possess. We often surpass this with no paying enough of an interest to the feature liable for such activities however the Bootstrap Checkbox Field is really a really critical element-- one our forms can not really do without.
Within newest fourth edition of the Bootstrap platform we are provided with the .form-check plus .form-check-label classes in order to demonstrate the good old default checkbox element and in the event that you would probably want them stacked just be sure you have recently wrapped them in an extra <div> with the .form-check class specified to it. In order your checkboxes to display properly in Bootstrap 4 you have to also assign the .form-check-label class to the <label> component and the <input> tag itself should carry the .form-check-input class.
How to employ the Bootstrap checkbox:
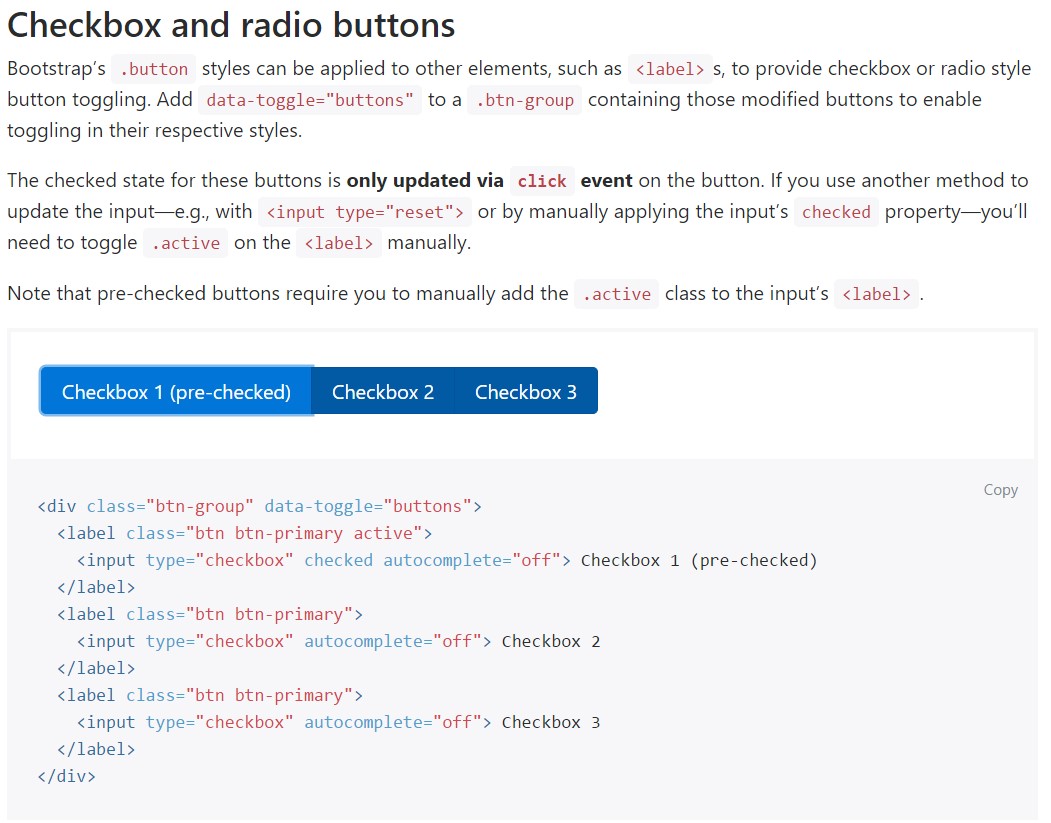
The checked state for these buttons is only updated via click event on the button.

<div class="btn-group" data-toggle="buttons">
  <label class="btn btn-primary active">
    <input type="checkbox" checked autocomplete="off"> Checkbox 1 (pre-checked)
  </label>
  <label class="btn btn-primary">
    <input type="checkbox" autocomplete="off"> Checkbox 2
  </label>
  <label class="btn btn-primary">
    <input type="checkbox" autocomplete="off"> Checkbox 3
  </label>
</div>
From time to time we need to have the checkboxes to be in our forms without the site visitor really can bring any kind of practice clicking on them-- that is really where exactly the disabled option shows up.
To disable efficiently a checkbox in Bootstrap 4 working with the typical HTML attribute disabled attribute along with simply just including it you could quite possibly as well format the pointer in cases where the website visitor hovers over the disabled feature turning it to a "not enabled " icon generating your forms extra simple and instinctive to use.
On the occasion that you really like the concept and really want to work on this you have to specify the .disabled class to the parent .form-check element in order the result to display ideal though the whole feature has been actually hovered-- this will get considerably more evident
A different situation
When using checkboxes, wrap them in a <label> element by having the Bootstrap 4 .custom-control and .custom-checkbox classes employed.
Use .custom-control-input to the concrete <input> element.
Additionally utilize two <span> elements: one with the .custom-control-indicator class employed, and the other with .custom-control-description ( and also insert the certain label in this element).
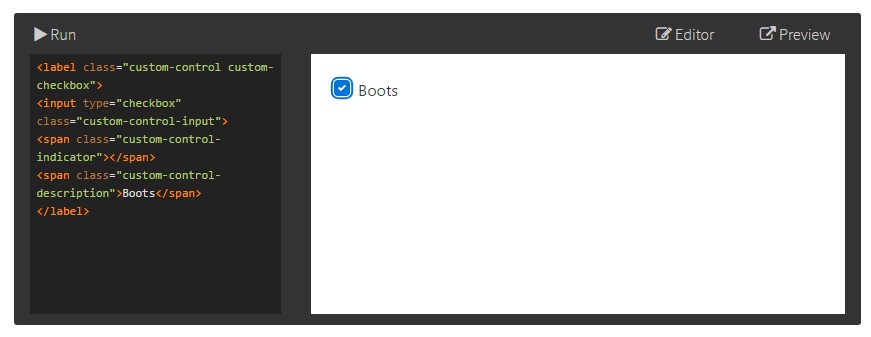
<label class="custom-control custom-checkbox">
<input type="checkbox" class="custom-control-input">
<span class="custom-control-indicator"></span>
<span class="custom-control-description">Boots</span>
</label>
Bootstrap Checkbox Input forms
Default checkboxes and radios are developed upon with the assistance of .form-check, a singular class for each input types that betters the layout and actions of their HTML elements. Checkboxes are for selecting one or else a handful of selections inside a selection, when radios are for choosing just one capability from numerous.
The disabled class is going to in addition lighten the message color to help identify the input's state.
A brand new feature for the Bootstrap edition 4 framework is the initiation of the so called custom made form elements. These are the similar elements we are knowing within functionality although designated even more desirable and also in the Bootstrap way. With them you are able to provide certain spice as well as style to your material through simply just assigning a number of extra classes to the commands you include in your forms.
In order to work with customized checkboxes wrap them in a <label> element specifying to it the .custom-control and .custom-checkbox classes. Whenever building the <input> element make sure you have indeed additionally added the .custom-control-input to it. You must as well apply two <span> elements - one having .custom-control-indicator class applied and other carrying the .custom-control-description class along with the actual description you would certainly need to have to attach to the label your Bootstrap Checkbox Class.
Final thoughts
That's essentially all that you require to execute in order to add a checkbox feature inside of your Bootstrap 4 powered website and bring in certain custom made flavor to it providing it a fantastic looks. Right now all you need to do is repeat the drill until you have actually reviewed all the checkboxes wanted are already on the page.
Take a look at a few on-line video information about Bootstrap checkbox
Related topics:
Bootstrap checkbox official records
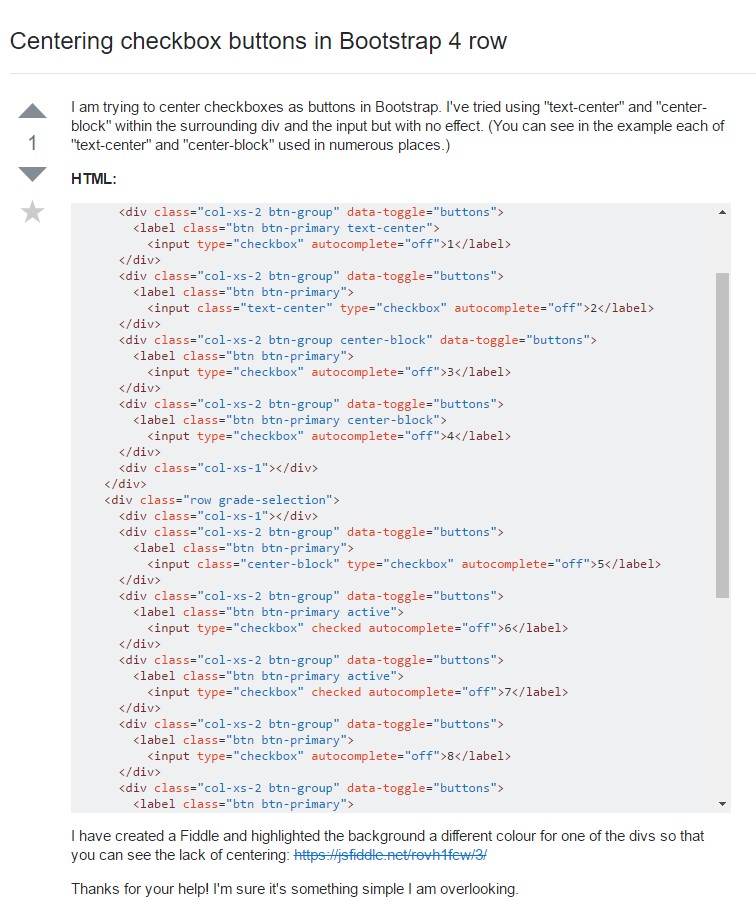
Centering checkbox buttons in Bootstrap 4 row
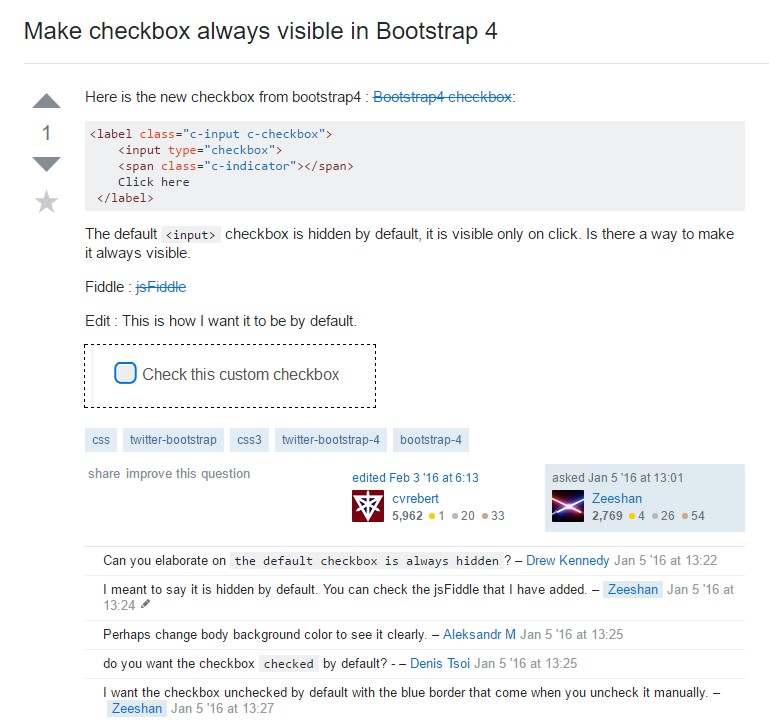
Make checkbox always visible in Bootstrap 4